
Merkato Version 2 Buyer’s User Manual
DRAFT VERSION 0.9
InvisibleHand Networks, Inc
3 Burlington Woods Dr.
4th Floor
Burlington, MA 01803
781-221-4800
ÓCopyright 2001 Invisible Hand Networks
All Rights Reserved.
This document contains information, which is protected by copyright. Reproduction, adaptation, or translation without prior permission is prohibited, except as allowed under the copyright laws.
The following are trademarks, registered trademarks, or service marks of Invisible Hand Networks: Merkato
Java is a trade mark of Sun Microsystems
Disclaimer
The information contained in this document is subject to change without notice.
DOCUMENTATION IS PROVIDED “AS IS” AND INVISIBLE HAND NETWORKS MAKES NO WARRANTY OF ANY KIND WITH REGARD TO THIS MATERIAL, INCUDING, BUT NOT LIMITED TO, THE IMPLIED WARRANTIES OF MERCHANTABILITY AND FITNESS FOR A PARTICULAR PURPOSE, EXCEPT TO THE EXTENT THAT SUCH DISCLAIMERS ARE HELD TO BE LEGALLY INVALID.
Invisible Hand Networks, Inc. shall not be liable for errors contained herein, or for incidental or consequential damages in connection with the furnishing, performance, or use of this material.
Revision History:
Draft 0.5 – Portal information added
“Cascade” and “Tile” Desktop functions added
Auction Table “zoom” description added
Draft 0.7 – Includes ARC comments
Getting started guide added, outline title numbers added
Draft 0.8 – Minor Format Changes
Draft 0.9 – Final comments from Adriana
Contents
Quick Start for Reservation Market
Arranging Panels within Agent Windows
Spot Market vs. Reservation Market Agents
Reservation Market Agent Window
The Progressive Second Price Auction
Optimizing Your Valuation Settings
Using the “Max Qty” (or “Qty”)
valuation settings
Using the “Min Qty” setting in the
Budget-with-limits valuation
Bidding only when you need
bandwidth
Using both the Spot and Reservation
markets
Using the Bid Table to Estimate Market Prices
Quick Start Guide
This section presents a simplified guide to obtaining bandwidth through the Merkato system. It is assumed that you have been given a username and password with which to access the system as well as the URL of the Merkato portal.
To begin, point your Windows IE browser to the Merkato portal. You will see a greeting page and login prompt, which may look similar to the one below.
Enter your username and password and press “Login” or “Go” (whichever is presented to you).
You will be brought to a page which has an
agent configuration area to the left, and an interface selection pull-down to
the right, as shown above.
At this point, you need to decide how you wish to obtain bandwidth. There are two options available: The Merkato spot market and the Merkato reservation market.
To obtain bandwidth from the spot market, you configure your Merkato agent to bid on your behalf in a continuous bandwidth auction. To obtain bandwidth in the reservation market, you use your Merkato agent to ask for a fixed price quote based on the quantity and duration of the reservation you would like to make. There are advantages to both methods:
· Reservations eliminate uncertainty. You know how much bandwidth you will be receiving, for what duration, and for what price. In the spot market, distribution of bandwidth is based on ranking bidders by price offered. It is possible that for some period of time you will be unable to obtain the full amount of bandwidth you desire because you are out-bid by other buyers.
· The spot market provides true bandwidth-on-demand. The changes you make to your agent bidding profile take effect in 5 to 10 minutes. You can even stop bidding entirely for a period of time, if you wish. Reservations may be cancelled, but only if you agree to pay a cancellation fee set by the seller.
· The reservation market prices are set by the seller. Spot market prices are determined by a unique progressive second price bidding process. You do not necessarily pay what you offer, you pay the unit price of the lowest bidder to be awarded bandwidth. This is the true “market price” for the bandwidth offered by the seller as established by the community of active buyers. Although not guaranteed to be so, the spot market prices are often lower than reservation market pricing because buyers tend to make short-term reservations if the spot market pricing gets too high.
You need not choose one or the other purchasing option exclusively. Any bandwidth you purchase on the spot market will be added to bandwidth you purchase on the reservation market. Many buyers use the reservation market to “lock in” their minimum required bandwidth, and then use the spot market to purchase additional bandwidth as required.
Quick Start for Reservation Market
To begin the process of obtaining bandwidth on the spot market, go to the interface pull-down, select “Desktop” and press “submit”.
If this is the first time you have used the system, you will be guided through the installation of the Java version 1.3 plug-in for your browser. (If this fails, consult the chapter in this manual which explains how to install the plug-in manually.)
If the Java plug-in is working correctly, you will see a series of download messages and then you will see a window displayed, called the “Merkato desktop”. Under the “File” menu-bar header, select “Download Agent”.
You will see a secondary login window with your username and password already entered, as shown below.

Now, depending on how your Merkato administrator has set up you system, you will need to do one of two things:
· If your Garage choices are a pull-down list which indicates both spot and reservation marketplaces, select the reservation garage and press “download”.
· If you have a single generic garage choice, then you will have been given two distinct usernames and passwords by your Merkato administrator – one for each market. In this case, make sure that the username and password correspond to the reservation market and press “download”. You will see an agent panel like the one below. This is the agent interface through which you will be making your reservation.
The steps to making a reservation are as follows:
1. If your agent has been configured to be able to make reservations in several different marketplaces (i.e. purchase from several different sellers), select the marketplace using the pull-down list in the “Resource” panel.
2. “Connect” to the marketplace by using either the menu-bar list under the “Selection” header, or click on the double-arrow icon at the top left of the window.
3. Read the available capacity from either the News or Resource Panel. If this capacity is greater than or equal to what you want, proceed. If not, you can either attempt to obtain what is available, or consider buying bandwidth on the spot market.
4. If the capacity you want is available, display the reservation request (“strategy”) panel by selecting “Reservation Strategy” under the “Strategy” menu-bar header. You will have to expand the display area to see the Reservation Strategy Panel. The easy way to resize the agent window automatically is to press the square-within-a-square icon on the menu-bar (or select “pack” under the ”View” menu-bar header). The agent window will automatically resize itself to accommodate the panels you are currently displaying.
5. Select the end date and time for your reservation using the pull-down fields in the “End Time” area of the panel. (The requested start time is always “now”.) As you make changes to the end time and date, the total duration of the reservation will be automatically calculated and shown in the “Reservation” area of the panel. Next, enter the amount of bandwidth you want in the “Reservation” portion of the panel. (Note that if the quantity or time units in the Reservation area do not suit your needs, bring up the Units panel (under the “Selection” menu-bar heading) and change them with the pull-down lists. The units displayed for all panels will automatically change and all previously entered values will be recalculated and displayed in the new units.
6. If necessary, click on the “Current Strategy” radio button at the top of the panel to make the Reservation Strategy active (you will be reminded in a pop-up message if you forget). When satisfied that the quantity and duration are what you require, press “Get Quote”.
7. You will be shown a quote in a pop-up window. If the price and cancellation fee are acceptable to you, press “Accept”. Otherwise, press “Refuse” and revise your reservation request.
8. Once you have pressed “Accept”, your reservation has been activated. To review or cancel your reservation, use the “Reservation Table” panel, which is accessed under the “Status” menu-bar heading.
Multiple overlapping reservations may be created. The aggregate bandwidth will be automatically combined by the Merkato system into a single large allocation.
When you are satisfied that your reservation had been accepted and implemented, upload your agent either by clicking on the up-arrow symbol in the icon bar or selecting “Upload” under the “File” heading of the menu-bar.
When the confirmation window appears, press “OK”. The Merkato desktop window will remain. Exit it by either clicking on the “x” in the upper right hand corner of the window, or select “Exit Merkato” in the menu-bar list under “File”.
You will then be back at the portal page and can either look at your agent status there, or press “logout” in the selection list at the left side of the page.
Quick Start for Spot Market
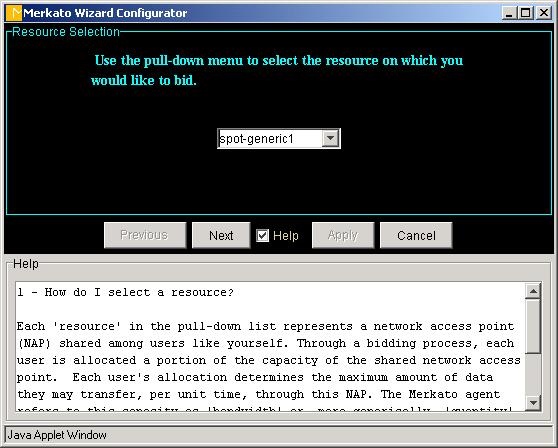
To begin obtaining bandwidth in the spot market, you will need to configure your agent to know how much you are willing to pay for available amounts of bandwidth so it can bid for you automatically. This is referred to in Merkato terminology as “creating your valuation profile”. Merkato provides a step-by-step “Wizard” to help you configure your agent. To access the Wizard, select it from the portal interface list, as shown below.
The Wizard will take you step-by-step through configuration of your Merkato spot market agent. Detailed help is available for each page of the Wizard when you activate it via the check-box at the bottom of the page.
When you have completed the Wizard, you will have:
1. Specified the bandwidth resource which you would like to obtain
2. Selected units for display of currency, bandwidth quantity, and time
3. Set a minimum amount of bandwidth which you would like to obtain
4. Set a maximum amount of bandwidth which you would like to obtain
5. Set a budget which you do not want to exceed when bidding for bandwidth between your two established quantity thresholds
The final page confirms your choices and gives you the option to begin bidding, or not, after the configuration changes are applied to your agent.
To begin obtaining bandwidth in the spot market immediately, select “Apply the settings and start bidding” from the pull-down list and press the “Apply” button at the bottom of the screen. Answer “Yes” to the confirmation window that appears. Then return to the portal page on your browser window.
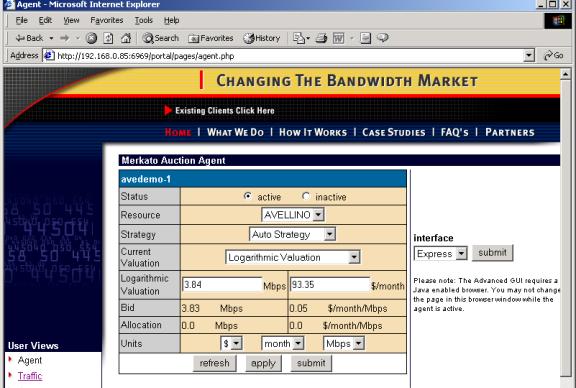
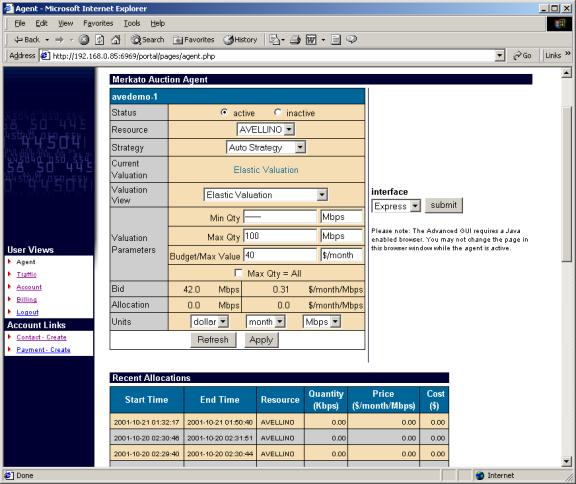
Select “Express” from the pull-down interface selection list in the portal and press “submit”. You will see the results of your configuration changes displayed in the “Express” interface within the portal, as shown below.
The fields in the Express interface will indicate:
· Status = “Active” (Shows that agent is actively bidding)
· Resource = Resource selected in the Wizard
· Current Valuation = “Budget Valuation with Limits”
· Valuation Parameters (Min Qty, Max Qty, Budget) are those selected in the Wizard (If you selected no min quantity, Min Qty = 0, if you selected “All” for Max Qty, this field will be blank and the “Max Qty = All” checkbox will be checked.
· Bid = the last bid your agent placed. To the left is the quantity requested. To the right is the unit price offered. The product of these two numbers should always be exactly equal your budget. Press “Refresh” to receive an update.
· “Units” should reflect currency, time, and quantity selections made in the Wizard interface.
· After 5-10 minutes, when you press “Refresh”, the Allocation field will appear. This field shows the allocation you received during the last round of bidding (which is now active during the current round of bidding).To the left is the quantity of bandwidth you received. To the right is the unit price you paid. The product of these two values will always be equal to, or less than, the budget you set in your valuation.
Next Steps
You should now be successfully obtaining bandwidth in the Spot or Reservation markets, or both. At this point, you may want to explore the desktop agent interface to obtain real-time status information and observe the auction in progress. You may also want to learn more about how the portal can provide historical information about allocations, market prices, and the actual traffic you are running through the Merkato bandwidth resource. The last item is especially important and will help you determine how to further optimize your buying strategy to meet you needs.
What is Merkato?
Merkato is a unique way to obtain bandwidth, on demand, at fair and equitable prices. Merkato uses a patent pending Progressive Second Price Auction mechanism to collect bids from multiple buyers, analyze the bids to determine the natural market price for this bandwidth, and then automatically apportion that bandwidth to the successful bidders at the market price. The components of the Merkato system are illustrated below.
Buyers of bandwidth pre-configure their agents to be aware of the price they are willing to pay for a range of available quantity. The seller of the bandwidth also configures his strategy, which includes the minimum unit price at which he is willing to sell the bandwidth. Buyer and seller agents then express their willingness to pay for bandwidth in the form of bids (consisting of a unit price and quantity) and send them to the central Resource Agent. (Sellers create a price floor by offering to buy their own bandwidth at their lowest acceptable price.).The resource agent responds to bids with proposed allocations and pricing, which the buyer and seller agents can either accept (by not bidding further), or reject (by submitting another bid). When there is no more bidding, the auction closes, and actual allocations are made. The entire process takes no more than 5 minutes. The auction is completely open and fair, with all bidders anonymously seeing what the other bidders have offered. The Progressive Second Price auction mechanism ensures that all bidders receive their allocation at the fair market price, which will be equal to or less than the price they offered.
The core of the Merkato system is the Resource Agent. The Resource Agent is responsible for
· Collecting bids from active bidders,
· Determining a proposed allocation of bandwidth for each bidder based on the progressive second price auction rules,
· Calculating the market price for each bidder, and
· Distributing all this information anonymously to all bidders.
This represents only a single cycle in the bidding process. Bidders who did not receive an allocation, or whose allocation was less than requested, may submit another bid in order to improve their position. This cycle continues until each bidder is satisfied with their allocation, or cannot bid at the current market price. When bidding is complete, the Resource Agent will
· Inform all bidders of the final results,
· Send the bandwidth distribution information to the network driver for implementation the bandwidth distribution, and
· Send the billing information to the accounting database.
Although the auction allocation process is run continuously, there is no need for users to be directly involved at all times. Your agent will bid automatically for you based on a profile of the value you place on bandwidth, which you prepare in advance.
Your financial limits, bandwidth desires, and bidding strategy are expressed using templates provided via the Merkato user interface. These templates are created using the Valuation and Strategy panels in the interface
Once the agent is configured, Merkato offers the user the option of bidding from their PC using a Java-based application, or remotely communicating with their agent, which bids from a server co-located with the Resource Agent. The location near the Resource Agent from which the agent bids is referred to as the “Garage”. Both methods have their advantages. The Merkato Desktop display gives you real-time information about the auction and its participants. On the other hand, if you are not actively interacting with the application, it is best to return your agent to the “garage” to eliminate the potential of ceasing to bid due to PC or network connectivity problems.
Getting Started
Your first point of entry to the Merkato System is through the Portal, a web-based application which provides accounting and status information, as well as access to the Merkato agents. Your version of the portal may have a slightly different appearance than that shown below, but the functionality will be the same.
The user will initially see a page which contains username
and password fields. 
Enter a valid username and password to gain further entry.
Entering a valid username and password, and pressing the “Go” button, will result in display of the top-level agent page, shown below.
From there, entry is gained to the various pages which make up the Portal and to the agent interfaces – Express, Wizard, and Desktop.
(By default, the Express interface is displayed to the left of the interface selection field.)
Agent Login
· The “Wizard” interface walks you through the steps to set up your Merkato agent to obtain bandwidth on your behalf. The settings are automatically transferred to your agent and can be viewed and altered from either the Desktop or Express interfaces.
· The “Desktop” interface allows you to purchase bandwidth through a series of user-selectable panels. Your “agent” is brought to your PC and bids on your behalf from there.
· The “Express” interface is displayed the upper left of the Portal page upon successful login. This is how the user obtains status information from, and sends configuration information to, their agent in the “garage”. The Express interface is considered advanced because the fields are less interactive than the Java-based Merkato Desktop interface..
It is recommended that you select the Wizard interface first to make basic buying choices. As you become more advanced in your use of Merkato, you will want to make further changes through the Desktop interface. The Desktop interface also gives you the most detailed status information. As you become more proficient with Merkato, you may want to use the Express interface to make quick configuration changes and status checks without downloading your agent to your PC.
Installing the Java Plug-in
If this is the first time you are using Merkato on your PC, you must download the Java version 1.3.1 plug-in to your browser before accessing the Desktop or Wizard interfaces. You can allow Merkato to do this automatically for you, or you may download it directly from the source whose link is provided in the login page.
http://java.sun.com/products/plugin/
Follow the instruction and download the plug-in for Microsoft Explorer. (Note: As of this writing, to get the plug-in, you must download the entire Java Run Time Environment, which is greater than 5 MB in size. Note also that the Netscape version 6.1 browser for Windows appears to support the Merkato Java applications, but it is not fully tested in version 2.).
Configuration
Wizard
The “Wizard” interface walks you through the steps to set up Merkato to obtain bandwidth on your behalf. The Wizard may be used alone (when launched from the original login screen), to alter settings to your agent in the “garage”. It may also be used to alter settings in your agent on your PC when launched from a pull-down menu-bar in the Desktop interface.
When “Wizard” is first launched, the following panel appears:
You will be guided step-by-step in the process of making the following configuration decisions:
· The resource from which you wish to purchase bandwidth
· The currency, quantity, and time units with which you would like to express your purchasing requirements. (Changes can be made at any time and your previously entered values will be scaled to match your new units.)
· Your minimum bandwidth requirements
· Your maximum bandwidth requirements
· Your budget for purchasing bandwidth
· The state you wish your agent to be left in following the configuration changes (bidding or non-bidding)
Each panel is accompanied by a “help” sub-panel which can be activated using the check box at the bottom of the screen. The “help” panel provides information about the impact of the parameter you are setting and provides advice on making a choice.
The values configured in your agent at the time the Wizard is activated are displayed as initial values in the applicable fields.
You may use “Cancel” at any time to exit the Wizard without making changes. You will be asked to confirm your desire to exit the Wizard with a dialog box such as the one below.

Use the “Next” and “Previous” buttons to navigate forward and backward through the Wizard. Until you press “Apply” at the last screen, none of your changes take effect. When you press “Apply”, you will see the following confirmation screen, at which time you can confirm your desire to apply your changes, or return to the Wizard.

Desktop
Interface
The “Desktop” interface allows you to purchase bandwidth through a series of user-selectable panels. Your “agent” is brought to your PC and bids on your behalf from there.
You access the Desktop through the same login interface as the Wizard, but select “Desktop” as the Interface Choice.

When the Desktop Interface is accessed, the following window will appear.
Note the instructions to not close the window. You may browse to other pages, but must leave this browser window open for the Merkato Desktop to continue operating properly.
The first window you will see is the Merkato Desktop. This is the window from which you will download one or more Merkato agents.
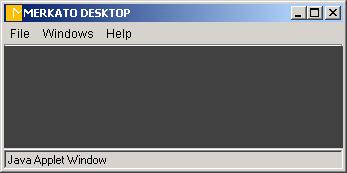
To download an agent, select the “Download Agent” command from the “File” menu-bar.
You will be prompted to enter the username and password for the desired agent. By default, this will be the same as the username and password you used to access the Desktop interface from the initial login (the fields will be populated with this information), but you may specify another valid username and password to download another agent.
If there is a choice, select the “garage” where the profile of your agent is kept. Generally, either your username will reflect whether you are downloading a reservation or spot agent, or the garage choice will determine it.
When downloaded, you will see an agent window similar to the one below.
Arranging Agent Windows
By default, all agent windows are constrained to be viewed from within the Desktop window. If you wish the agent window to appear as an independent window on your Windows screen, use the “Detach” function from the Desktop menu-bar, under “Window”, as shown below.
When the “Detach All” function is activated, a check will appear beside the name in the menu-bar list to indicate this.
Whether the agent windows are inside or outside the Desktop, they can be automatically arranged relative to each other. If you select “Tile All” within the “Windows” menu-bar list, the windows will arrange themselves in a tight, non-overlapping pattern.
Alternatively, you may select “Cascade All”, which arranges the windows so that the upper left-hand corners are all offset from each other and the windows form an overlapping pattern, as shown below.
Arranging Panels within Agent Windows
The agent window consists of multiple panels which can be displayed or not displayed as the user wishes.
By default, panels are stacked, as shown below. Each time a panel is selected for viewing, it appears beneath the one previously activated. If you wish to close a panel, you may either use the close-box tab at the upper right hand corner of the window (looks like an “x”), or re-select the panel in the pull-down menu-bar lists. The window will close and the other windows will fill in the spot it had occupied.
If you wish a more free-form placement of windows, then de-select the “Stack” icon (at the far right of the icon bar) or de-select “Stack” from the pull-down menu under “View”. Merkato panels can be arranged at will and even overlapped. If a panel is closed, the other panels do not move to occupy the vacant space.
To resize the agent window to exactly match the panels displayed, press the “Pack” icon (second from right) or use the equivalent function under the “View” menu-bar.
Upload Function

Your agent will obtain bandwidth for you by sending bids to a Resource Agent. Your agent may continue to bid on your behalf from a “garage” co-located with the Resource Agent when you close the agent on your PC (and using your current Desktop agent settings). This is known as “uploading” your agent. When you upload your agent, all configuration changes are saved and the agent on your PC is closed. Uploading is accomplished by either pressing the up-arrow on the icon bar (fourth from left) or selecting the equivalent function under the “File” menu-bar.
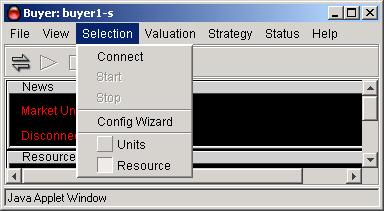
Connect/Start/Stop
The three icons at the upper left of the icon bar indicate “Connect”, “Start” and “Stop” respectively.
When you first download an agent, it will often be disconnected from the auction. Your agent will not bid or allow you to view any status if disconnected, although you may change and save configuration settings. The “Disconnect” state is indicated by the connect symbol on the icon bar (to the far left) being un-depressed and un-colored.
When you connect to the auction, by depressing the icon, or selecting “Connect” from under the “Selection” menu-bar item, you may observe the auction, but are not participating in it. The Auction Chart and Auction Table will show you the current auction in progress and allow you to make a determination whether or not you wish to join it.
When you wish to start bidding, either press the “Start” icon (second from left on icon bar) or select the “Start” list item under the “Selection” menu-bar label. Bidding will start immediately with the current active settings.
To cease bidding, press the “Stop” icon (third from left on icon bar) or select the “Stop” list item under the “Selection” menu-bar label. Bidding will cease and you will not only be returned to “Stop” mode, but will be disconnected as well. To begin previewing the auction again, you will need to “Connect” once more.
Note that if more than one user has access to the Merkato username and password, it is possible that one bidder will be previewing an auction and be observing his own agent bidding on another user’s PC. Since bidder ID’s are anonymous, there is no way to know whether your agent is already active when previewing an auction (although once you become adept at reading the auction table and auction canvas, it is possible to detect bidders who appear to have your valuation settings).
Should the user previewing the auction decide to press “Start” to begin bidding, they will see a message like the one below. Should they confirm their wish to begin bidding, their agent will gain control of the bidding process and the other agent on other user’s PC will be disconnected.

The last user to log in successfully always “wins” control of the agent, and the previous user will receive an error message, as shown below, indicating that their agent is no longer bidding.

Spot Market vs. Reservation Market Agents
There are two ways to purchase bandwidth in a Merkato system. You may request and receive a fixed amount of bandwidth, at a fixed price, for a fixed term, or you may create a bidding strategy and contend for bandwidth with other buyers at frequent intervals. The first method is called the Reservation market and uses a reservation agent. The second method is called the Spot market and uses a spot agent. Depending on how your administrator has set up your Merkato system, you may have separate usernames for each type of agent or they may share a common username and password. (If different agents share the same username, you will have to obtain them from different “garages”.)
The Spot Agent functionality will be described first, followed by the Reservation Agent functionality.
Spot Market Agent Window
The agent window consists of multiple panels which may be displayed, or not displayed, as the user wishes. The use of each panel will be discussed individually, in roughly the order one would expect a first-time user to access them.
Resource Panel
The resource panel is accessed via the “Selection” menu-bar list. If the agent is connected to the auction, the “capacity” display will indicate the total amount of bandwidth available for sale from this particular Resource Agent.
Note that a single agent can only bid on one resource at a time. If you select one resource, you automatically de-select the others. You may, however, preview other auctions by downloading a second agent while yours is bidding from your PC (or the garage) and connecting to other auctions without pressing “Start”.
Units Panel
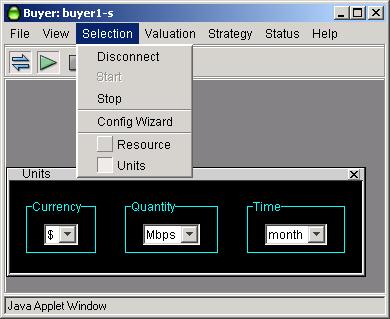
The units panel is used to select display units for all the other panels as well as for several pop-up message screens.
Currency units supported are dollars (“$”) and cents (“c”).
Quantity units supported are kilobits per second (“Kbps”), Megabits per second (“Mbps”), and gigabits per second (“Gbps”).
Time units supported are minutes (“min”), hours (“h”), days (“day”), and months (“month”).
The changes to any units take effect immediately. All values in all other panels are automatically scaled to reflect the new units without changing the actual values.
Valuations – General
“Valuation” indicates your maximum willingness to pay for various amounts of bandwidth. In the course of an auction, your agent uses this valuation information to determine whether to bid, how much bandwidth to ask for, and how much to offer, in response to changing market conditions.

Valuations are all grouped under the “Valuation” heading in the menu-bar.
The first item in the list, “Show only one”, controls whether successive selections of valuation replace the previous valuation shown, or result in multiple panels being displayed. If a check mark appears before this control, only one valuation will be shown at a time.
Each valuation has a “Current” radio button label at the top of the panel. To make a valuation active, click your mouse on this button in the desired valuation panel. (The previously active valuation will automatically have its “Current” button de-selected.) The green arrow in the menu-bar pull-down list also indicates which valuation is currently active.
The valuation panels represent how you, as a buyer, value varying amounts of bandwidth. Valuation panels use different parameters to change their shape and values, but all result in a representation of valuation and cost for a range of quantity (bandwidth). The chart to the left of the numerical entry boxes shows two curves; the red one is a representation of valuation vs. quantity and the yellow one is a representation of maximum cost vs. quantity. If there appears to be only one curve, it indicates that both curves are identical and overlapping.
Valuation, represented by the red curve, is an abstract concept which economists use to indicate the changing value buyers put on a resource. Mathematically, it is the area under (i.e. the integral) of the curve of unit price vs. quantity curve used to determine the actual bids to be placed.
More valuable for non-economists is the yellow curve of maximum cost vs. quantity. This represents the maximum out-of-pocket expense the buyer would pay were he to be allocated the indicated amount of bandwidth. (Whether the bidder actually pays this amount depends on whether this bidder obtains the last amount of bandwidth sold and therefore determines the market price. See the explanation of the Progressive Second Price auction mechanism forclarification).
Valuations are created by altering pre-selected valuation profiles. The following sections describe each valuation profile in detail. The choices are:
Budget Demand – Valuation is configured to have a constant cost for all units of bandwidth.
Budget Demand with limits – Same as “budget” but you can set the minimum and maximum bandwidth for which you will offer your fixed cost amount.
Inelastic Demand – Bidding at a constant unit price regardless of the quantity. Similar to a take-it-or-leave-it bid. You may get less quantity than you ask for, but the unit price will never exceed what you offer.
Elastic Demand – Similar to Budget Demand, except you lower the total cost you are willing to pay as bandwidth decreases.
Logarithmic Demand – Use this valuation if you wish to bid aggressively at a mid-point in the quantity range and less aggressively for higher or lower amounts.
As a reference, the following chart comparing the valuations might be useful.
This chart shows the relative bidding strategies for each of the valuations,
all normalized to a maximum cost of $10,000 per month and a maximum desired
quantity of 100 Mbps.
Note that in selecting valuation settings you may specify a maximum quantity desired which is greater than that the seller is offering. Your agent will still begin bidding at the amount the seller is offering, at the unit price as indicated from your Valuation curve. You may wish to configure your valuation for amounts greater than the seller is currently making available in case the seller decides to offer more bandwidth at a later date. You may also do so simply because you prefer the resulting bid curve (especially when working with the logarithmic curve and wish to move its most aggressive bidding point closer to your desired value).
For all valuations, you must press the “Apply” button on the panel, or <Enter> on the keyboard for changes to parameters to take effect. (The “Apply” button changes color from yellow to blue when a parameter is changed, and back to yellow when the change takes effect.. Note that changes to valuations only affect bidding if that particular valuation is active, as indicated by the radio button at the top of every panel and the green arrow in the pull-down menu list. If a valuation is not active, the changes are stored in anticipation of making that valuation active at a later time.)
When deciding how to bid at the lower levels of quantity, note that receiving no allocation (or not bidding) does not necessarily mean that your traffic has no bandwidth available to it. The data streams of agents which do not bid (or do not win any allocation) are generally funneled through a single, shared amount of permanently allocated bandwidth. Ask your Merkato administrator how much bandwidth is allocated to this “best effort queue” so that you can make the best decision of when to stop bidding on the low end (see budget-with-limits valuation).
The relative merits and typical uses of each valuation will be discussed further in the following sections.
Budget Valuation
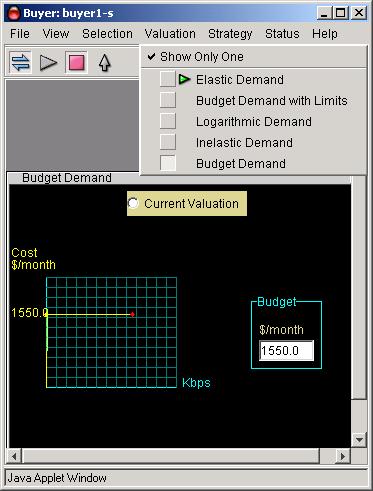
The Budget Demand valuation has a single configurable parameter – the “budget”, which is the total out-of-pocket amount you are willing to pay for any amount of bandwidth.
This is by far the easiest valuation to understand and configure. Use it when you want to purchase the maximum amount of bandwidth possible in each auction round.
Your agent will begin by offering the unit price corresponding to your budget for all the bandwidth available. If your agent is informed it will not receive this full allocation because the offered price is too low, it will bid again. The new bid will raise the unit price offered and lower the desired quantity requested so that the out-of-pocket amount remains the same. Of course, other agents may re-bid also when your offer is provisionally accepted, but theirs is not. This process continues until all bandwidth is apportioned among all bidders who are willing to pay the market price. The graph below, shows the calculation your agent does in response to rising market prices.
There are two disadvantages to the budget valuation:
1. Because you begin bidding by asking for all the bandwidth at your budgeted price, you will set the price floor instead of the seller if your unit price is higher than his configured floor price.
2. If your budgeted amount is low compared to other bidders, you could end up paying your entire budget for a very small amount of bandwidth. Your agent will continue to offer your entire budget for amounts as small as 1/500 of what is being offered, before it finally gives up and lets itself receive no allocation.
An advantage of the Budget valuation is that your agent will always begin by bidding for the full amount of bandwidth the seller is offering, whether it increases or decreases over time. With most of the other valuations, you must specify the maximum quantity you are interested in obtaining and would have to increase this setting to obtain more if the seller offered more.
Budget-with-limits Demand
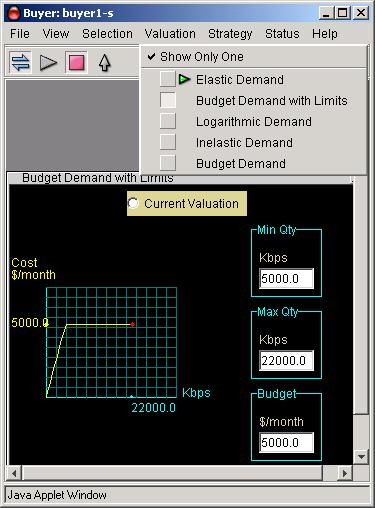
The Budget-with-limits Valuation is the one most commonly used, and the only one currently supported by the Wizard configuration application. There are three parameters which determine the bidding behavior for this valuation:
· Budget – The maximum out-of-pocket amount you are willing to spend.
· Max Qty – The maximum amount of bandwidth you desire.
· Min Qty – The minimum amount of bandwidth for which you are willing to pay your budgeted amount.
Your agent will begin bidding by asking for your configured maximum quantity at the unit price represented by your budget. If your agent is informed that it will not receive this allocation, it will bid again by lowering the amount of bandwidth requested and raising the unit price proportionally so that the total out-of-pocket amount remains the same. This behavior continues until either the agent receives the amount requested, or the minimum specified quantity is reached. At this point, the agent makes one final bid for the minimum quantity at the unit price represented by the budget. The agent will either receive this amount at the offered price, a lesser amount of bandwidth at the same unit price, or nothing at all, depending on how the auction proceeds.
There are several advantages to this valuation:
· By restricting the amount of bandwidth initially requested, you will not get more than you need and will not spend your entire budget if the market price is below your offered price.
· By restricting the amount of bandwidth initially requested, you will make bandwidth available for lower bidders who would set the market price and result in you paying less than your budgeted amount for the bandwidth you receive.
· By setting a lower boundary on bandwidth desired, you will not offer your full budget for a very small amount, should bidding become very aggressive. Of course, you run the risk of receiving no allocation of bandwidth at all and share the best-effort queue with the other bidders who also received no allocation, or are currently not participating in the auction.
Inelastic Demand Valuation
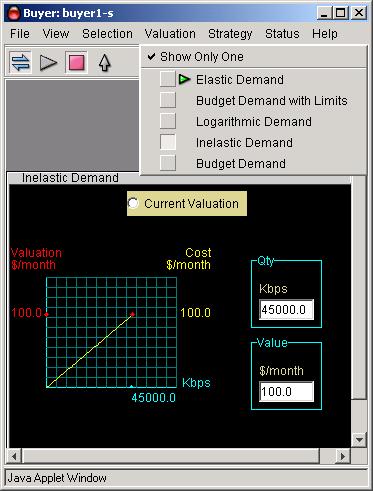
The Inelastic Demand valuation should only be used in unique situations.
Mathematically, your agent offers the same unit price regardless of the quantity requested, which might at first seem desirable. Practically, however, because bids are ranked by the Resource Agent based on unit price offered, this results in a take-it-or-leave-it offer by your agent. You receive an allocation only if the market price stays at or below your offered price. Your agent is not empowered, as in other valuations, to offer a higher unit price for a lower quantity in order to continue contending for an allocation.
Two configurable parameters determine the behavior of the Inelastic valuation.
· “Qty” sets the maximum quantity desired. Your agent initially requests this amount, and if rejected, may only request a lower amount at the same unit price.
· “Value” sets the maximum amount of out-of-pocket cost you are willing to pay for the maximum quantity desired. The unit price that your agent will offer in its bids is the “Value” divided by the “Qty”.
Note that the cost and valuation curves are identical, so only the cost (yellow) curve is shown.
Elastic Demand Valuation

The Elastic Demand Valuation is similar in concept to the budget valuation, but it bids at a reduced overall cost as the market price rises. In other words, as the market price rises, the Elastic demand agent will ask for less bandwidth than a similarly configured Budget demand agent.
The two configurable parameters for the Elastic Demand valuation are maximum quantity (“Qty”) and maximum value (“Value”). Configure the maximum quantity to correspond to the maximum quantity you would like to be allocated. Configure the maximum value to correspond to the maximum price you are willing to pay should you receive that amount of bandwidth. The maximum cost is always half of the “Value” you enter, as indicated in the chart to the left of the numerical entry boxes.
Logarithmic Valuation

The Logarithmic valuation is unique in that the maximum cost offered for bandwidth occurs at a mid-point of quantity, rather than at the maximum specified quantity. Use this valuation if you wish to bid more aggressively for a certain amount of bandwidth, but progressively less aggressively for amounts above and below that amount.
There are two configurable parameters for the Logarithmic Demand valuation, maximum quantity (“Qty”) and maximum value (“Value”). You might want to set the maximum quantity based on one of two possible criteria:
1. Set it to correspond to the greatest amount of bandwidth you would consider obtaining. Note that your agent’s bid is zero at this point, so it is impossible for you to receive exactly this amount.
2. Set the maximum quantity to place the peak cost bid at a desired quantity. The peak cost bid will be offered at around 37% of the maximum quantity you specify. For example, if you wanted to bid most aggressively at 20 Mbps, you would set the maximum quantity to 20/0.37 = 54 Mbps.
Set the maximum value to correspond to the desired maximum cost. The maximum out-of-pocket cost will be approximately 37% of the value you set, as indicated by the graph to the left of the text entry fields. Continuing the previous example, if you are willing to pay up to $200 per Mbps (per month) for the 20 Mbps you desire, this is a total cost of $4,000 per month. The valuation you set is $4,000/0.37 = $10,811, as shown below.
Strategy – General

Once you have configured your valuation (the value you place on various amounts of bandwidth), you must configure how you want you agent to use that information. In this version of Merkato, there are only two strategy options for use in the Spot market: Automatic and Manual, which are explained in the subsections which follow.
As for the Valuation settings, you may view and select strategy setting independently from each other.
To view only one strategy panel at a time, with the most recently selected panel replacing the previously selected panel, click on “Show Only One” at the top of the Strategy menu-bar list. A check mark will appear next to the list item. If you wish to view multiple strategies at one time, de-select the “Show Only One” option.
The active strategy is selected using the “Current Strategy” radio button at the top of each Strategy panel. Clicking on this button in any panel will activate that strategy and automatically de-activate any other strategies. A green arrow in the menu-bar list also indicates the current active strategy.
Automatic Strategy
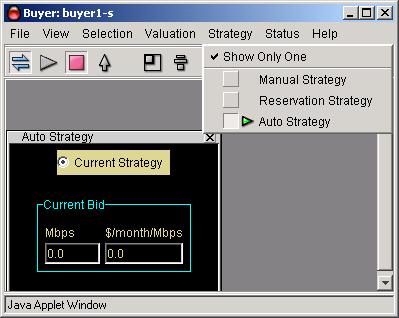
The Automatic Strategy is the one that is most commonly used. It begins by bidding for the maximum quantity (or seller quantity, whichever is less) at the unit price specified by the valuation settings. If informed that it did not obtain this amount of bandwidth, the agent will bid again, if permitted by the valuation, at an incrementally higher unit price but adjust the amount of bandwidth requested to agree with the valuation curves. This process continues until either the agent receives the amount it requested, or it cannot to bid above the current market price based on the valuation settings.
The two display fields in the Automatic Strategy panel show the current bid: quantity in the left hand display, and unit price in the right hand display.
Manual Strategy
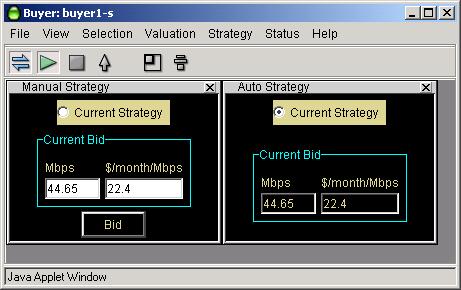
Manual strategy ignores the valuation settings completely and allows the user to place his own bids. Note that these bids are a one-time occurrence and are not repeated in successive auction rounds. If you wish to place a take-it-or-leave-it bid each auction round, use the Inelastic valuation and select the automatic strategy to submit the bids automatically.
To place a manual bid, enter the quantity desired in the left hand numerical entry box, and the desired unit price in the right hand numerical entry box (pay close attention to the units displayed, so you do not make an error). After both the numerical values are entered, press the “bid” button. Your bid will be submitted to the Resource Agent. You may observe the results of your bid in the Auction Table or the Auction Chart panels.
The initial displayed value in the Manual Strategy panel is the last bid placed by the Automatic Strategy. You may, if you wish, view both the automatic and manual strategy screens simultaneously and quickly activate the manual strategy if you wish to place a bid. Note that if you return to the Automatic strategy, the agent will return to bidding along the original valuation curve according to its standard bidding strategy.
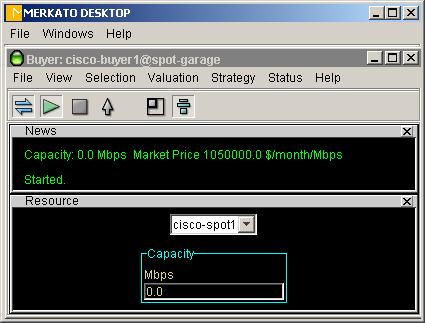
News
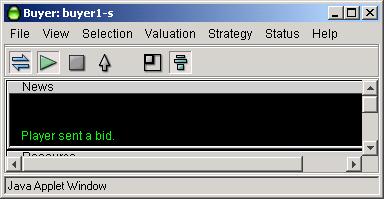
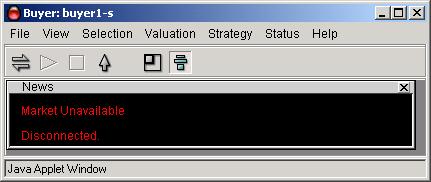
The News panel provides real-time status of your Merkato agent. It is useful when you want to get a quick summary of marketplace conditions and confirm the state of your agent.
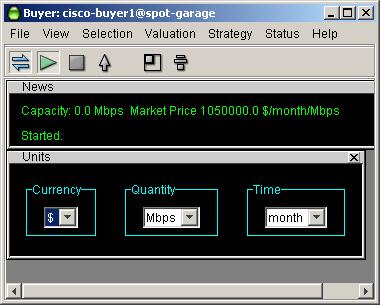
When your agent is in the “disconnected” state, you will see a display similar to that below.
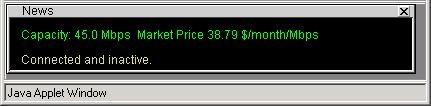
When connected, but not bidding, you will see a display like the one below, which indicates the capacity being offered by the seller and the current market price of the auction as it is proceeding without your agent's participation.
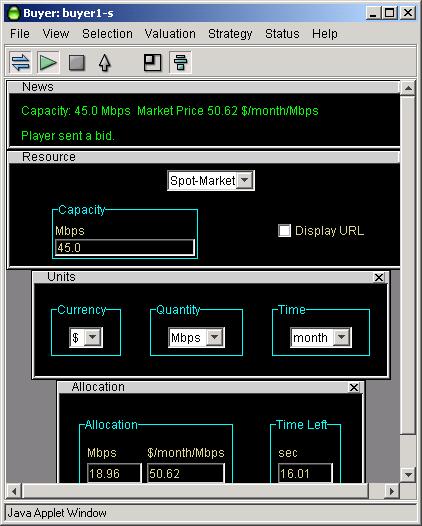
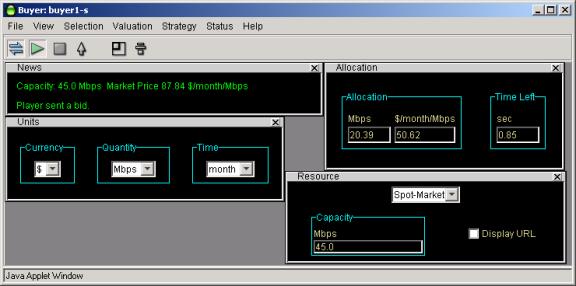
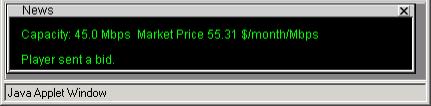
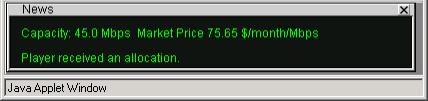
Once you begin bidding, you will see displays like the ones below, which add information indicating activity between your agent and the resource agent, which conducts the auction.
Allocation
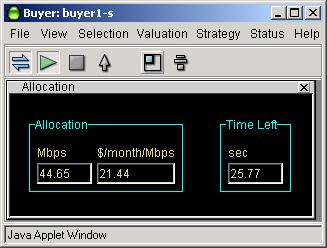
The Allocation panel provides information as to the quantity of bandwidth received and the price paid for that bandwidth at the close of each successive auction. When an allocation has been made to your agent, it appears in the left-hand side of the Allocation panel, and is displayed throughout the next auction. Note that after a period of non-bidding, the allocation indicated is the last one made to this agent when it was last active.
The allocation panel also provides a time indicator for the current auction. Each time any buyer places a bid, the timer is reset to 60 seconds. When your agent is in the “disconnected” state, you will see a display similar to that below.

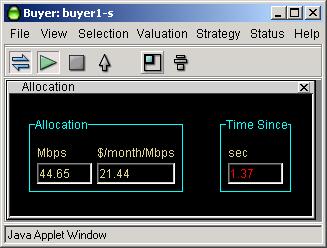
When all bidders cease bidding, the timer will count down to zero. At that point, the proposed allocations are turned into real allocations by the resource agent. This occurs during a "pause" period. The pause period is indicated by several changes to the time display: the timer label changing from "Time Left" to "Time Since", the font changing to red, and the counter counting up to the pause limit, rather than counting down, as before (see below).
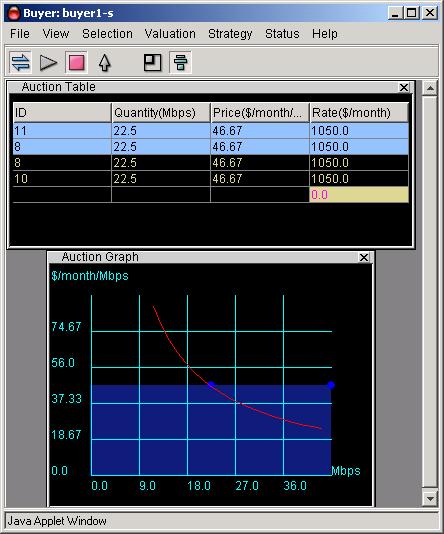
Auction ChartThe Auction chart graphically indicates the state of the Merkato auction in progress, not only for your agent, but for all others actively bidding.
The chart elements are:
· Auto-scaling Y-axis indicating unit price (axis is scaled to show all current bids).
· Auto-scaling X-axis indicating quantity (axis is scaled to show available quantity.
· Blue dots representing the last bids received from all bidders (excluding bids by your agent).
· A red dot, with ID number, indicating the last bid from your agent.
· A magenta circle representing the current proposed allocation for your agent.(Each time any bidder places a bid, your agent received a proposed allocation. If no other bids are received, this is the allocation you would receive.)
· A solid magenta dot indicating the allocation you received during the previous auction round.
· A red line representing your agent's valuation curve as determined by settings in your active valuation panel.
· A blue shaded area representing the allocation of bandwidth to successful bidders, except for any bandwidth allocated to your agent. This area is a series of blocks, where the height represents the unit price paid and the width represents the quantity allocated. The highest bidder's block is to the right, with the next highest bidder’s block immediately to the left of it, until all the bandwidth available has been accounted for. By not showing the bandwidth allocated to your agent, the level of the blue shading exactly under your last bid (the red dot) indicates the current market price.
The black area above the blue shaded area represents the level at which you would have to place a bid to win a desired amount of bandwidth from a current bidder. Your active valuation curve is visible in relation to other bidders, whether you are bidding or not. This allows you to optimize your valuation curve with respect to the other bidders before you begin actively bidding. The place at which your red curve intersects the top of the blue shaded area indicates the quantity and price of bandwidth you would receive if other bidders placed the bids you can currently observe. Of course, once you start bidding, other bidders will react to your presence in the auction and perhaps raise the market price (the blue shaded area) above what it was without you. The two screen captures, below, show this happening as the bidder (indicated with yellow area) reacts to your presence in the marketplace. The best way of fending off other bidders and getting exactly the bandwidth you want, is to have your curve nearly vertical at the quantity you desire. (Of course, this also means that you are willing to pay a higher unit price for bandwidth as well.) See the Advanced Buyers Guide for more information.
I think this image is wrong, and should be removed. However, it I “cut” it the
change does not show up, so I am leaving it.How was this picture made ?! It is
impossible to download a same player more than once into the Desktop !
Clicking on the auction chart changes the quantity scaling from the quantity being offered by the seller to the maximum quantity specified in your valuation. This is useful if your configured maximum is significantly less than the total quantity offered by the seller and you want to “zoom in” on the portion of the chart which is important to you. Note that the unit price (“Y”) axis auto-scales when you change the quantity scale, as shown below.
Auction Table
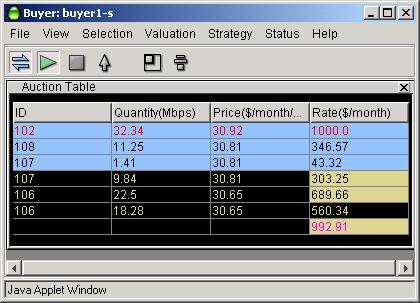
The Auction Table gives you a quantitative, real-time view of the auction in progress.
The columns of the Auction table may be resized (by clicking and dragging column boundaries in the header) or reordered (by clicking and dragging the column headers themselves). The columns are:
· The ID of the bidder. A bidder receives a new ID whenever it is uploaded from the garage.
· The quantity requested in the last bid placed (note that this may be split into multiple rows, as explained below).
· The price (unit price) requested in the last bid placed.
· The "rate" represented by the bid. This is the quantity times the price. It is the maximum cost represented by that bid, but not necessarily the price that will be paid by the bidder.
The elements of the rows of Auction Table are as follows:
· Your agent's last bid is shown with a red font. The last bids of all other agents are shown with a black font (in the blue shaded area) or with a yellow font (in the black area).
· Any bidders, including your agent, which receive an allocation of bandwidth are shown in the blue shaded area. Any bidder who does not receive an allocation is shown in the black area. If a bidder receives only a portion of an allocation, they are shown in both the blue and black areas, with their quantity split accordingly.
· The black area is used to represent the basis for the actual cost paid by your agent if it has received an allocation of bandwidth. How this is actually done is a fairly advanced topic and is explained in the chapter on the Progressive Second Price auction rule. In summary, the yellow shaded areas to the right of the uppermost bidders in the black area indicate the basis of your cost, and the yellow shaded number with magenta font at the bottom of the table indicates your total cost. To figure your corresponding unit price, divide this number by the amount of bandwidth indicated for your agent in the blue shaded area.
Uploading and Exiting

When you wish to terminate a session on your Desktop, you will generally want to upload your agent to the garage to continue bidding on your behalf. (Currently, uploading your agent is the only way to save configuration changes. In a future release, you will be able to save configuration changes to your agent's profile in the garage without exiting your Desktop agent.)
Use either the up-arrow in the icon bar, or the "Upload" menu-bar item in the "File" category to access this function. You will be presented with a confirmation query message, as shown below.
The confirmation message indicates the garage where your agent will be placed. If you press "Cancel" at this point, you will be returned to the Desktop agent and no upload will occur. Note that the confirmation message indicates whether your agent is bidding or not. If your agent is stopped when you upload, your confirmation message will look like the one below.
Make sure the bidding state is the one you wish to maintain while your agent is in the garage.
In rare instances, you will want to close your Desktop window without updating your agent's profile in the garage. You will do this by selecting "Close" rather than "Upload" in the menu-bar list. When you do this, the following confirmation screen will be displayed:

Selecting "Yes" will result in an "Upload" being done before the "Close".
Selecting "No" will result in your Desktop agent window being closed without saving any changes you might have made.
Selecting "Cancel" will return you to your Desktop agent. Neither "Upload" nor "Close" will occur.
Help

Help screens are available at both the Desktop and the agent level.
Reservation Market Agent Window
The Reservation agent gives the user the ability to obtain bandwidth for an extended period of time at a fixed price. The pricing is set by the seller and depends both on the quantity of bandwidth desired and the duration of the reservation. In the current version of Merkato, all reservations begin immediately and there is no reservation fee.
Reservations may be cancelled at any time prior to expiration, but there is a cancellation fee based on a percentage of the remaining value of the reservation. The seller sets this percentage, which may be any value between 0% (no penalty for cancellation) to 100% (no refund on cancellation). The cancellation percentage is quoted to the user at the time the reservation is made and again when the cancellation is confirmed.
Reservations are created using the Reservation Strategy panel. Active reservations are viewed and cancelled via the Reservation Table panel. These panels are not accessible unless the resource selected in the Resource panel supports reservations.
Reservation agents must be uploaded into the garage when you no longer want them displayed on your Desktop. The risk for not doing so is not as significant as for the Spot agents. You will simply lose the last entries you have made in the reservation request fields, but not the reservations you have already confirmed.
The following sections describe the use of these reservation panels in detail.
Resource Panel
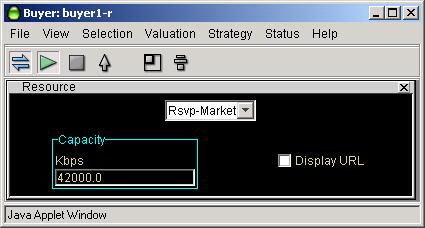
Although a reservation and spot marketplace may allocate the same physical resource, they are controlled by Merkato via separate Resource Agents. In this version of Merkato, bandwidth is pre-assigned to each one of these markets, so reservations do not take bandwidth from the spot market or vice versa.
In order to access the reservation panels, you must select a reservation resource from the Resource panel. The “Capacity” display in the Resource panel informs you as to the bandwidth currently available to you in that marketplace, taking into account quantities currently being allocated to other reservation buyers.
Reservation Strategy
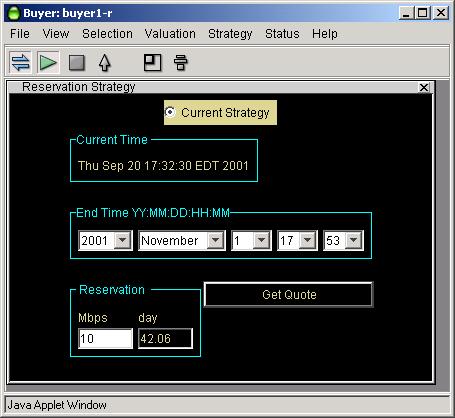
The Reservation Strategy panel is used to create a reservation. Since reservations start immediately, there are no “Start Date/Time” entry fields. The current time is displayed instead. (Note that there may be a delay of as much as 5 minutes from the time the user confirms a reservation until it becomes active.)
The middle group of pull-down fields represents the end date and time. It is up to the user to make sure that the date is valid (no February 30th, for example). Should you inadvertently enter an invalid date, Merkato will attempt to determine your intent and present an equivalent valid date. If this is not what you intended to specify, refuse the reservation and return to the date selection panel.
The third group of information entry fields, at the bottom of the panel, indicate the desired quantity and calculated duration, respectively. The units for these fields match those selected in the Units panel. To complete your desired reservation profile, enter your desired amount of bandwidth and press “Get Quote”. A pop-up confirmation window will appear, similar to that shown below.
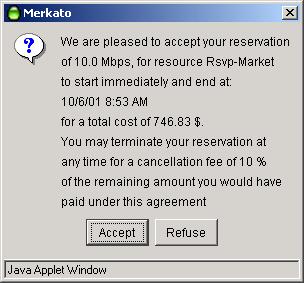
This confirmation form indicates:
· The amount you have requested
· The end date and time of your reservation
· The total cost (unit cost times quantity time duration) of your reservation
· The percentage cancellation fee, applied against the remaining value of the reservation, which will be charged should you elect to terminate a reservation before the end date and time.
Look over all this information carefully before you press “Accept”. If the end date and time is different than you specified, it indicates that you entered an invalid date and Merkato made the best guess of your intent by adding the duration to the current date and time.
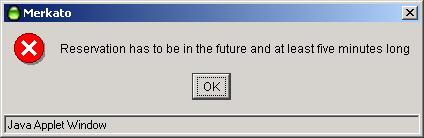
Note that given the free-form nature of these fields, it is possible to specify a date and time before the current time. If you inadvertently specify an end date before the start date, an error message like the one below will be displayed.

If your reservation is for a time period which is too short, the following error message will be displayed.
If you specify a quantity which cannot be allocated to you due to other active reservations, you will receive the following error message in place of the reservation confirmation pop-up window.

This error message informs you of both your requested quantity and the quantity available, so you can make appropriate adjustments.
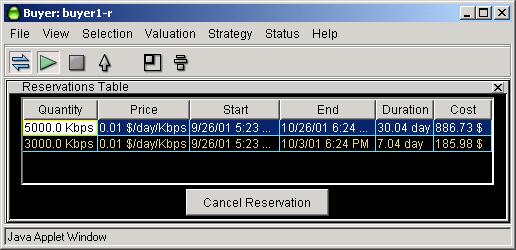
Reservations Table
The reservations table allows you to view and cancel reservations.
When you have confirmed your reservation, it will appear in your Reservation Table. The reservation table is accessed through the “Status” menu-bar list.

The columns of the reservation table may be resized and reordered. To resize a column, click and drag the boundary line between columns within the column header. To move a column to another position, drag and drop its header either to the right or to the left of its current position.
Should you desire to cancel a reservation, click anywhere in the row that represents the reservation. The reservation will be highlighted in blue. Then press the “Cancel Reservation” button at the bottom of the panel.
You will be presented with a confirmation pop-up window similar to that shown below.
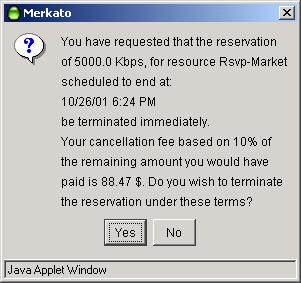
The reservation cancellation confirmation screen indicates the following information:
· The quantity of the reservation.
· The scheduled end date and time of the reservation.
· The percentage cancellation fee which will be applied to the remaining value of your contract if you confirm the cancellation.
· The total amount that you will be billed, based on the remaining duration of your reservation, the original total value of your reservation, and the percentage cancellation fee.
If you wish to proceed with canceling the reservation under these terms, press “Yes”. If you wish to not cancel your reservation, press “No”.
Expired reservations are automatically removed from the Reservation table a short while after their end time and date.
Portal
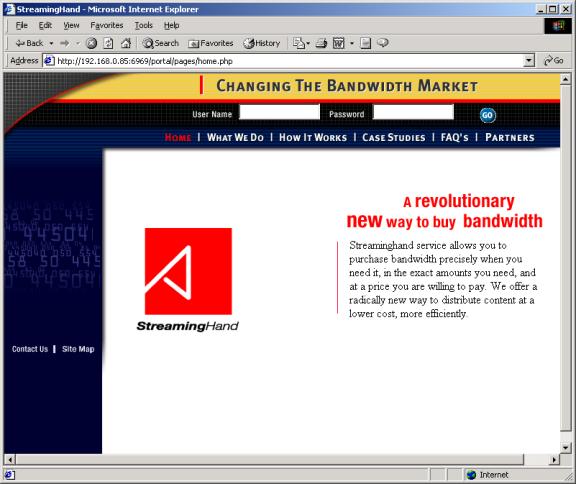
The portal is the entry point to gain access to the agent applications, as well
as to obtain historical allocation and billing information. The user will
initially see a page similar to the one below, and will enter their Username
and Password to gain further entry.
Entering a valid username and password, and pressing the “Go” button, wilresult in display of the top-level agent page, shown below.
The Express agent interface is shown at the top of the page, with the agent
selection pull-down to the right. Below these areas are the agent status
screens indicating recent allocations and market price.
The left portion of the page contains a navigation bar, which provides access to all pages of the portal:
· Agent – (The page shown) contains the Express agent interface, the Agent selection pull-down, the allocation table, and market price charts.
· Traffic – Contains Monthly, Weekly, and Daily charts of traffic associated with this user.
· Account – Contains personal information for this user, including lists of contact and payment records.
· Billing – Provides a billing interface which allows the user to create customer queries into the Merkato database, and automatically provides account balance information.
· Logout – Returns user to log-in screen.
· Contact Create – Interface to create contact records. Multiple contact records may be created for each account.
· Payment Create – Interface to create payment records. Multiple payment records may be created for each account.
Portal Agent Page
The Interface pull-down portion of the screen provides access to the Wizard and Desktop agent applications, described in their own sections of this document. The other areas of the Agent page will be described below.
Express (HTML) Interface
The Express interface is an HTML version of the Desktop interface, with some significant differences:
· It leaves your agent in the garage and controls it remotely. Should you inadvertently close this window, it will make no different to your agent in the garage.
· Your screen is not updated in real time. You must press the “Refresh” button to update information in status displays.
The Express interface is meant to support advanced users who know what the fields mean and wish to have a quick way to check agent status or make configuration changes.
You access the Express interface through the initial portal browser window. If your agent was active and bidding from the garage, you will see a window like the one below.
If your agent was active and bidding from the garage, you will see a window like the one below.

The two buttons at the bottom of the window control your communication with the Resource Agent.
· “Refresh” updates the read-only status fields in the windows without sending configuration changes to the Resource Agent.
· “Apply” updates the read-only status fields in the windows and sends configuration changes to the Resource Agent.
To exit the Express window without sending configuration changes to the Resource Agent, simply press “refresh”. All values saved the last time changes were applied will be restored.
The fields in this display are as follows (identified by their row headers):
· “Status” – Controls whether the agent is bidding or not. You must press “Apply” for this change to take effect.
· “Resource” – Selection list for the resource for which you are bidding. You must press “Apply” for this selection to take effect.
· “Strategy” – Auto Strategy is the only strategy supported by the Express interface. Manual strategy can be selected, but there are no bid entry fields. Reservations panels are not currently supported.
· “Current Valuation” – This is display of the valuation currently in use. To change the current valuation, display another valuation and press “Apply”.
· “Valuation View” – This pull-down menu selection allows the user to select and alter settings of valuations without making them active. When you are satisfied with the settings for a new valuation, press “Apply”. The displayed valuation will become the active (current) one, with the configuration values you have entered.
· “Valuation Parameters” – This set of panels contain the settings for the valuation chosen. You must press “Apply” after changes are made, for them to take effect. Not all parameters have meaning for all valuations. If a parameter is not used, its value is indicated as a horizontal bar.
· “Bid” – A read-only display indicating the latest bid submitted. You must press “Refresh” to update this display. If this display is missing, it indicates that your agent is inactive and not bidding.
· “Allocation” – A read-only display indicating the allocation received in the last round. You must press “Refresh” to update this display. If this display is missing, either your agent is “inactive”, or you did not receive an allocation in the previous round.
· “Units” – The selections made in this panel change the units displayed for all other panels. All values are scaled to reflect the change in units. You need not press “Apply” for this change to take effect.
When your agent is inactive and not bidding from the garage, the Bid and Allocation rows will be missing, as shown below.
Some error messages, are displayed in pop-up windows as shown below.
we need another picture here if it is possible
Other error messages are displayed in the browser window, above the Express Interface form.
Allocation Table
The
Allocation table shows bandwidth allocated to this user and the amount charged
for this bandwidth. The order is most recent to least recent. Each row
corresponds to a single Merkato auction (for Spot market resources) or a single
reservation (for Reservation market resources). The columns are as follows:
·
Start Time – The start date and time for this
allocation
·
End Time – The end date and time for this
allocation
·
Quantity (Kbps) – The bandwidth quantity for
this allocation
·
Price ($/month/Mbps) – The unit price for this
allocation
· Cost ($) – The bottom-line cost for this allocation
The purpose of the Allocation table is to give the user an indication that Merkato auctions have been providing the desired results. You may obtain information for longer timeframes in the Billing page via custom queries.
Market Price
The market price indicates the price paid for the last unit of bandwidth sold. Under normal operation, all bidders will pay this price for the bandwidth they receive. Fluctuations of this price indicate changes in the dynamics of the market – i.e. bidders entering or leaving the market or altering their valuation profiles.
The market price graphs present two time scales:
· Average market price on an hourly basis.
· Average market price on a daily basis.
Several bits of information can be obtained from this chart. If the market price is at the floor price of the seller, it indicates that the demand for bandwidth is less than the supply. If the market price is above the floor price, it indicates that all the bandwidth available is being sold. Fluctuations in the price when it is above the floor indicate that buyers are changing their bidding behavior within this titimeframe.
![]()
Traffic Page
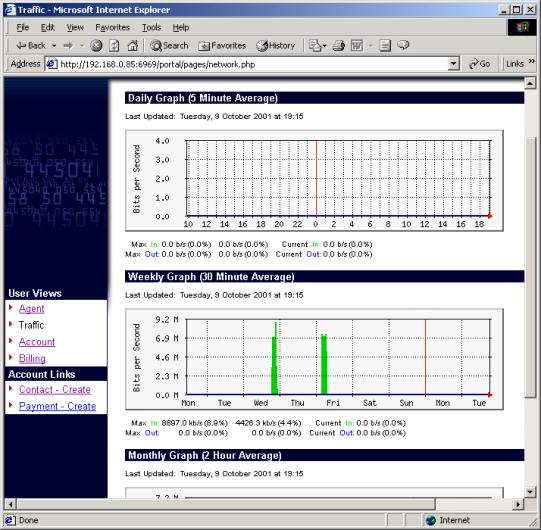
The traffic page shows the amount of data transferred through the Merkato network control point by the data stream associated with this user. Three charts are provided to represent three timeframes:
· Daily chart showing 5 minute granularity.
· Weekly chart showing 30 minute granularity.
· Monthly chart showing 2 hour granularity.
All three charts are based on 5 minute sample intervals. Merkato gathers traffic statistics in both the input and output direction every 5 minutes. Each 5 minute sample represents an average over that 5 minute period. In other words, peaks of duration less than 5 minutes will not be accurately represented in the charts. These 5-minute samples are used directly in the daily chart. These values are then combined into longer averages for the weekly and monthly charts.
The green-shaded portion of the chart indicates traffic in the incoming direction. Traffic indicated by the blue line is in the outgoing direction. If you are unclear which direction corresponds to “in” and “out” with respect to your application, contact your Merkato administrator.
Below each chart, are three columns of figures indicating the maximum, average, and current values for the period being displayed.
Use
the traffic charts to help you decide how much bandwidth to purchase on the
spot and reservations markets. Often
the best buying strategy is to buy what you normally use on the Reservation
market, and purchase additional bandwidth during periods of burst demand on the
Spot market. The traffic charts will also help you select the maximum desired
quantity for your Spot market valuation
settings. There is little performance improvement, but potentially significant
cost impact, to purchasing more bandwidth than you need.
Account Page
The Accounting page presents account information for this user, as well as a list of Contact and Payment records.
Edit Player Form
The “Edit Player” section displays the name for this buyer configured by the Merkato administrator. A password hint and answer can be configured as well, to help the user remember their password. (Note: The users have to be logged in to see this themselves. If they forgot their password, prior to logging in, they must contact their Merkato administrator to obtain the password hint and answer.) The current password hint categories are:
· None
· Date of Birth
· City of Birth
· Mother’s maiden name
· Your Pet’s name
The response to this “question” is given in the next line. The delivery mechanism can be provided as well. Currently only e-mail or regular mail (or both) are supported for this field.
Contact List
The contact list contains the list of contact profiles you have previously created. If you click on any list item, it will bring up a page which displays the information within this record. If you wish to create a record, use the “Contact – create” utility, accessible via the page selection menu at the left of the page.
Several contacts can be created for one Merkato user account. Coordinate with your Merkato administrator as to how multiple contacts are to function relative to each other (contact of any one is sufficient, contact of all is desired, primary contact with backups, etc.).
If you click on an entry, a page will appear which indicates the contact information for the record selected. You may alter this information by clicking on the “Edit” button at the bottom of the page. (See the Contact – Create section for an explanation of filling in or altering fields within this form.)
Payment List
The payment list contains the list of payment profiles you have previously created. If you click on any list item, it will bring you to a page which displays the information within this record. If you wish to create a record, use the “Payment – Create” utility, accessible via the page selection menu at the left of the page.
More than one payment method may be created for a user account, but you must contact your Merkato administrator as to how billings to multiple payment profiles are to be handled.
If you click on an entry, a page will appear which indicates the payment information for the record selected. You may alter this information by clicking on the “Edit” button at the bottom of the page. (See the Payment – Create section for an explanation of filling in or altering fields within this form.)
Billing Page
The
billing page allows you to do custom queries of the accounting database as well
as display your current balance. (Currently, the Balance field displays the
charges for all known allocations. In a future release of the portal, this will
reflect the true balance, minus payments.)
Billing Query Form
The billing query form allows you to select start and end dates. Rather than enter the dates manually, you can click on the small calendar icon to the right of the field. A pop-up calendar appears from which you may select your start and end dates.
Similarly, the resource can be selected from a list when the pie-chart icon is pressed.
The selection buttons on the right of the form control how the information is displayed on the screen. For example, displaying the information per resource without daily detail would look like this:
But
when daily detail is selected, it breaks the data down further:
Contact Create Page
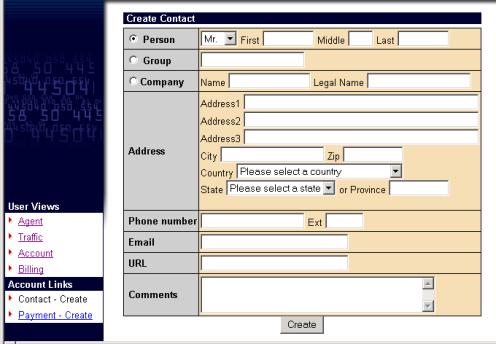
The
Contact – Create page allows you to create contact records which are associated
with this user.
When your entry is complete, press the “Create” button. Should your entry be incomplete, you will be shown a screen like the one below, and allowed to edit the record further.
If you wish to edit your entry later, click on the appropriate contact record in the “Account” page and, when the information is displayed, click the “edit” button at the bottom of the form.
Payment - Create Page
The Payment-Create page is used to create a database record with payment information in it. The create form looks like this:
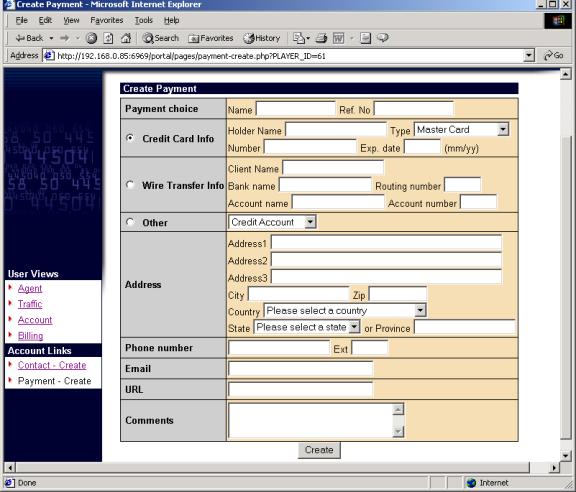
It
is designed to accommodate many different bandwidth market applications, so you
should contact your Merkato administrator to determine what information is
required.
When
you have completed filling out the form, press the “Create” button at the
bottom. If you fail to enter all necessary fields, a page will appear
indicating which fields need to be fully completed.
Should you desire to edit this record later, select it in the “Account” page,
and press “Edit” at the bottom of the display that appears. An information
entry form similar to the original “create” form will appear and you may change
any records at that time.
The Progressive Second Price Auction
The patent-pending Progressive Second Price (PSP) auction mechanism creates the rules by which the Merkato marketplace operates. The features of PSP include:
· The ability to divide resources among many bidders – not just establish one winner.
· The ability to react quickly to changes in buyer’s valuation of the resource for sale.
· The ability to support any number of bidders who may enter or leave the bidding at will.
· Establishment of market mechanisms which create a fair market price for bandwidth, benefiting both buyers and sellers.
· Creation of market rules, which encourage bidders to be maximally truthful about their desires and willingness to pay, which allows auctions to converge quickly.
The InvisibleHand Merkato implementation of the PSP algorithm provides the following additional features:
· Light-weight protocol between bidders and resource agent which does not contribute significantly to bandwidth utilization.
· Support for multiple buyers and one seller, as well as multiple sellers and one buyer.
· Support for broker agents which can buy bandwidth from one source and resell it to many buyers.
· Ability of customers to create automated bidding decisions based on mix-and-match combinations of valuation, budget, and strategy.
· Inclusion of sellers as bidders which allows them to take bandwidth off the market if they do not feel the price is sufficiently high.
In order to understand the Progressive Second Price auction mechanism, it helps to consider the rules and motivations behind a non-progressive simple second price auction. In an auction where many buyers are bidding for a single item, a second price mechanism is a way to most quickly decide the highest bidder, without the normal incremental bidding process. In a simple auction, where the highest bidder pays the price they bid, bidders will raise their bids incrementally in successive bidding rounds. Each bidder’s goal is to obtain the item at the lowest price, which will be the price just above what the second-place bidder is willing to pay.
The second price rule does away with the incremental bidding – but achieves the same result - by asking each bidder for a single bid representing what they are willing to pay for the item. The first place bidder wins the item, but pays the amount offered by the second place bidder. That way, the first place bidder is guaranteed that they will not overpay for the item by revealing the maximum amount they are willing to pay and the seller gets essentially the same amount for the item that they would have, had the bidding price been raised incrementally until the second place buyer dropped out.
Applying this principle to a divisible resource such as bandwidth is where the “progressive” extension of the second price auction comes in. In a Progressive Second Price auction, each bid consists of a unit price and the amount of the resource desired at that price. The bidders are ranked by unit price and then are tentatively awarded the amount they requested until the supply is exhausted. Unsuccessful bidders may re-bid in order to replace successful bidders in the ranking (hence the term “progressive”). The price every successful bidder pays is the price offered by the lowest successful bidder (in a strict interpretation of second price rules, it would be the highest unsuccessful bidder(s) who sets the price, however, the “progressive” nature of the bidding tends to turn all bidders into winners, which would leave no basis from which to set the price). Eventually, all bidders will have been awarded a share of the bandwidth or dropped out of the bidding because the “market price” is higher than they wish to pay for any amount of bandwidth.
An example might help clarify the process. Let’s assume that the seller has 10 Mbps to sell and 6 bidders are interested. Bids indicate the amount of bandwidth desired, as well as the unit price they are willing to pay. Let’s assume that the initial bids were these:
Bidder A: 3 Mbps desired at $100 unit price ($300 total)
Bidder B: 5 Mbps desired at $80 unit price ($400 total)
Bidder C: 3 Mbps desired at $50 unit price ($150 total)
Bidder D: 4 Mbps desired at $30 unit price ($120 total)
Bidder E: 6 Mbps desired at $20 unit price ($120 total)
Bidder F: 3 Mbps desired at $10 unit price ($30 total)
Bidders would be ranked according to their offers as shown in the following chart:
Figure 1 Stacked Bids Received for Portions of 10 Mbps of Bandwidth Offered by Seller
The shaded area represents the amount of money the seller is being offered (unit price times quantity). The green shaded area at the left represents the amount offered by successful bidders.
It might be instructive to determine what the seller would receive had he had simply taken the highest initial offers. As you can see, with 10 Mbps for sale, the highest two bidders (“A” and “B”) would receive what they want, and the third highest (“C”) would receive two of the three Mbps he desired. If the seller simply accepted the offers, they would receive $300 + $400 + $100 = $800 for the bandwidth offered from the successful bidders. This represents $80 per Mbps average price for the 10 Mbps offered.
Now lets look at how the bandwidth would be sold in a Merkato Progressive Second Price auction. To recap, the rules of the second price auction are as follows.
All bidders may make multiple sequential offers.
After each offer is received, the “resource agent” (which runs the auction) ranks the bids according to price offered and apportions bandwidth to the highest bidders.
The price at which the lowest successful bidder receives bandwidth is the “market price”, which every successful bidder pays.
The bid and re-bid cycle repeats until all bidders are satisfied with the amount of bandwidth received and their price or have dropped out of the bidding.
Let’s assume that the initial offers from all bidders are as before. All bidders would be informed that the current market price is $50 and the successful and unsuccessful bidders would be informed of their status and allocation (if any). If the second price auction stopped here, the seller would receive $50 for each unit of bandwidth, or a total of $500 for the 10 Mbps of bandwidth, which is $300 less than he would have received by simply accepting the initial offers. Fortunately, for the seller, the process does not end here!
The unsuccessful bidders will bid again, if they can afford to. Bidders "stay in the game" by increasing the unit price offered for bandwidth, above that of the lowest successful bidder. How can a bidder afford to do this if they revealed what they are willing to pay in their first bid? Well, assume that the bidder’s initial offer was determined by a total cost limit as opposed to a desired unit price. In this case, the bidder would desire to re-bid as long as a consistent total cost was maintained - by lowering the requested amount of bandwidth proportionally to any increase in offered unit price. (In Merkato, this price vs quantity information is carried by the valuation settings.) Let’s assume, for simplicity, that all the bidders follow this same strategy and that their initial bids represent their total budget for bandwidth.
Bidder “D” was the highest unsuccessful bidder, offering a unit price of $30 for 4 units of bandwidth. This represents a budget of $120. Bidder “D” sees he can become a successful bidder, this round, by bidding above a unit price of $50. His next offer could be 60 unit price for 2 Mbps of bandwidth and stay within his budget limits. Each bidder can do this in turn if they find themselves pushed out of the successful bidder’s column. Although all the examples so far have involved increments of 1 Mbps of bandwidth, bidders are under no such restriction. Even bidder “F”, with a $30 budget, may become a successful bidder by asking for a fractional amount of bandwidth.
A simulation shows that when the bidding ends, the final bids would look like this:
Bidder A: 2.7 Mbps desired at $112 unit price ($300 total)
Bidder B: 3.6 Mbps desired at $112 unit price ($400 total)
Bidder C: 1.3 Mbps desired at $112 unit price ($150 total)
Bidder D: 1.1 Mbps desired at $112 unit price ($120 total)
Bidder E: 1.1 Mbps desired at $112 unit price ($120 total)
Bidder F: 0.2 Mbps desired at $112 unit price ($30 total)
The chart below, shows the bids graphically, as before:
Figure 2 Auction Results Under Progressive Second Price Mechanism
The market price of $112.00 represents the amount all bidders would have to offer in order that all are awarded bandwidth, but stay within their initial budget. The seller would receive $1120.00 for the 10 items.
Every bidder is a “winner” and receives an amount of bandwidth proportional to their willingness to pay and consistent with the bidding policies they established for their Merkato agent.
Advanced Buyers Guide
This section contains advice for the advanced user who is familiar with Merkato and wants to optimize the settings further.
Optimizing Your Valuation Settings
There are various ways in which you can use the Merkato capabilities to maximize the amount of bandwidth received and minimize your cost
Using the “Max Qty” (or “Qty”) valuation settings
The “Max Qty” setting in the Budget-with-limits valuation and the “Qty” settings in the Elastic, Inelastic, and Logarithmic valuations constrain your agent to purchase no more than the quantity entered. Using this parameter to buy only the amount of bandwidth you need will lower your cost for two reasons:
1. Simple mathematics. Assuming a fixed unit price, if you purchase less bandwidth, you will pay less in total cost.
2. Requesting less bandwidth will often lower the market price for everyone. In Merkato, market price is driven by demand. If all bidders begin their bidding by asking for all the bandwidth the seller has available, the market price is driven up as buyers bid and re-bid in an effort to win an allocation. If a bidder initially asks for a small fixed quantity at a high price, however, they essentially “take that bandwidth off the top” and the other bidders will contend for what is left. The high price bidder will pay what the other bidders determine is the market price based on contention for what is left over.
As an example, if five bidders, each with a budget of $5000 bid for a total of 100 Mbps, each would receive an allocation of 20 Mbps at a market price of $250/Mbps. If one bidder decided that he didn’t need 20 Mbps and used the Budget-with-limits valuation to set his maximum quantity to 15 Mbps, the market price would drop to $235 for everyone and that bidder would pay a total cost of $3530 for the 15 Mbps he wanted (as opposed to $5000 for 20 Mbps he didn’t really need). Of course the other bidders would benefit from the market price drop as well. However, their benefit would be in the form of increased allocation rather than decreased cost. They would each receive 21.25 Mbps for their $5000 budget.
Using the “Min Qty” setting in the Budget-with-limits valuation
One disadvantage of the simple Budget valuation is that it never gives up attempting to obtain as much bandwidth as it can for the budgeted amount as market prices rise. This means that in extreme circumstances, a bidder could pay his entire budget for a very small amount of bandwidth. Under the Merkato system, bidders who receive no allocation during a round have their traffic routed through a shared, fixed-bandwidth data path. Ask your Merkato administrator for the size of this “best-effort queue” and use that information to determine the level of bandwidth for which you would rather be in the shared data path “for free” rather than pay your budget for an allocation of a similar amount. Be conservative, though. The throughput and latency of your data stream when you are in the “best effort queue” depends heavily on how many other bidders are there and how much data they are transferring at the same time.
Bidding only when you need bandwidth
Merkato allows you to stop bidding at any time. If your application requires bandwidth only during certain time of the day or days of the month, consider stopping your agent during periods of inactivity. You can then either pocket the money you save, or use it to raise your budget (and receive a greater allocation) during times when you are actively using the link.
The Logarithmic valuation
Many people like the benefits of setting a maximum quantity, but would not mind receiving more bandwidth if the price were right. The Logarithmic valuation can be used to create such a strategy.
Using both the Spot and Reservation markets
The reservation market allows you to purchase bandwidth for an extended time at a fixed price. The spot market reacts quickly to changes in buyer valuation and may result in either savings or a price premium relative to the reservation pricing. A desirable strategy might be to purchase the absolute minimum amount of bandwidth you require via a reservation and then use the Spot market to add additional capacity if the price is attractive or your needs increase unexpectedly.
Using the Bid Table to Estimate Market Prices
Although
you can preview an auction without entering it, this information will not
indicate directly what impact the participation of your agent will have on the
market price. You can estimate your impact if you can determine the valuation
used by other bidders.
It
is sometimes possible to guess a bidder's valuation based on these entries.
·
If
the "rate" (far right value) of a bidder remains constant, they are
most likely bidding on a budget.
·
If
the quantity (second from left) field is constant, it indicates that the bidder
has set a maximum bandwidth level. (The other indicator is that the bidder is
offering more than the current market price, but is not driving the market up
to his level)
If
you can divide all bidders into these two categories, you can estimate the
market price you will have to pay for any unit of bandwidth, without bidding.
Then continue the process as follows.
1.
Add
up the total bandwidth requested by all bidders who have set a maximum
bandwidth level and for whom the market price is lower than their offered
price. Subtract this bandwidth from the total the seller is offering.
2.
Add
up the rates of all the bidders who are using "budget" valuation. Divide this number by the amount of bandwidth remaining from the
first calculation. This is the natural market price for this auction.
3.
To
determine what you would have to pay for an amount of bandwidth assuming these
bidders keep their current valuations and budgets, subtract the
bandwidth you want from the total that the "budget" bidders were contending for. Then re-do the market price
calculation.
You
would have to bid above this price to obtain the bandwidth you desire (your
budget would have to be at least the
bandwidth you desire times the market price you calculated). If you want to
ensure that you receive this bandwidth without driving up the market price
further, you can either bid exactly this amount, or set a budget, which is
higher, but specify the bandwidth you desire as the maximum amount in the
budget-with-max valuation panel.
Appendix A Valuation Formulas
If you wish to enter the valuation formulas into a spreadsheet to analyze them, they are provided below. Remember, this is what you bid, but your actual cost is based on the market price as determined by progressive second price auction rules.
The curves will vary according to settings in the valuation panels. To avoid confusion, the names of the settings have been given in the formulas as:
· “Budget” for budget settings in budget-based valuations
· “MaxQty” for either “Max Qty” in Budget-with-limits or the single “Qty” setting in the other valuation panels
· “MinQty” for the minimum quantity setting in the Budget-with-limits valuation
· “MaxValue” for the “Value” setting in the valuation panels
The variables in the equations are:
· “Price” for the unit price
· “Qty” for the quantity of bandwidth which will be requested at that price
Note that the units do not matter as long as you are consistent throughout:
· Budget is in currency per unit time (such as $/month). (Often for simplicity in discussions, we omit the “per month” part.)
· Quantities are quantities of bandwidth expressed in Gbps, Mbps, or Kbps.
· Price is in currency per unit bandwidth per unit time (such as $/Mbps/Month). (Often for simplicity in discussions, we omit the “per month” part.)
· MaxValue is in terms of currency per unit time (such as $/month). (Often for simplicity in discussions, we omit the “per month” part.)
To convert price to cost, multiply by the quantity (“Qty” in the equations).
Budget Demand
Price = Budget / Qty
Budget-with-limits Demand
For Qty < MinQty
Price = Budget / MinQty
For MinQty <= Qty <= MaxQty
Price = Budget / Qty
For Qty > MaxQty
Price = 0
Inelastic Demand
For Qty <= MaxQty
Price = MaxValue / MaxQty
For Qty > MaxQty
Price = 0
Elastic Demand
Note: “SQRT” = Square Root of what follows in parentheses
For Qty <= MaxQty
Price = MaxValue / ( 2 * SQRT( MaxQty )*SQRT( Qty ))
For Qty > MaxQty
Price = 0
Logarithmic Demand
Note: “Ln” = Natural logarithm of what follows in parentheses
For Qty <= MaxQty
Price = ( MaxValue / MaxQty ) * Ln(MaxQty / Qty )
For Qty > MaxQty
Price = 0